- You’ll create a fungible token (Jetton) on TON using a master “minter” contract plus a wallet contract for each user.
- You’ll rely on Blueprint and Sandbox to compile, test, and deploy standard TON FunC contracts.
- You’ll apply the Jetton standard (TEP74) for token transfers and metadata (TEP64) for properties like symbol and decimals.
- By the end, you’ll have a baseline fungible token on the TON testnet ready for any custom logic.
Main article
In this tutorial, we will discuss the standard implementation of fungible tokens on the TON blockchain and walk through the development steps using the Blueprint environment and Sandbox.Run nodes on Chainstack
Start for free and get your app to production levels immediately. No credit card required. You can sign up with your GitHub, X, Google, or Microsoft account.Introduction
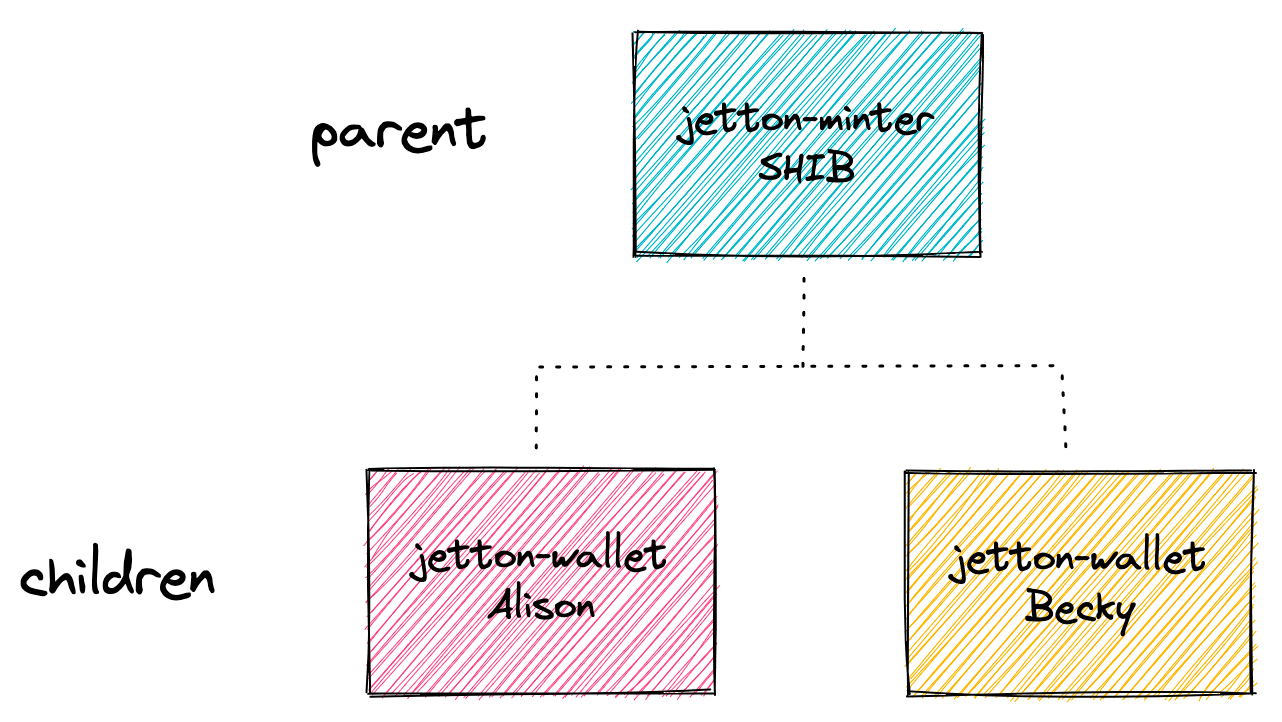
The suggested approach for fungible tokens on TON involves having a minter contract (also called a master contract) and a specific wallet contract for each user. This allows taking advantage of the TON blockchain architecture and its sharding feature. The minter contract holds key token metrics and parameters, while the wallet contract maintains a balance of a specific user and allows transferring and burning tokens. This is described in more detail in the TON standards (TEPs). Let’s examine those related to fungible tokens.Jetton standard
TON fungible tokens are called Jettons. The Jetton standard is described in TEP74. The specification for metadata of all tokens on TON is in TEP64. The Jetton standard (TEP74) describes:- The method for Jetton transfers.
- How to retrieve common information (name, circulating supply, etc.) about a given Jetton asset.
Development
Contracts
Let’s create an empty Blueprint project with FunC in the current folder:blueprint.config.ts file and paste your Chainstack endpoint. In this tutorial, we work with the testnet:
contracts folder. We need jetton-minter-discoverable.fc, jetton-wallet.fc and jetton-utils.fc, discovery-params.fc, op-codes.fc, params.fc. Let’s briefly walk through them.
The minter contract allows the admin (the contract owner) to manage the minting process and total tupply. Additionally, it implements the TEP89 feature for Jetton wallet discovery, which simplifies obtaining a Jetton wallet address by other smart contracts. Previously, this was challenging because contracts couldn’t use get methods on other contracts directly.
The wallet contract manages Jetton token transfers, storage, and burning for a specific user. It tracks the wallet balance, owner’s address, and Jetton master details, updating the data after transfers or burns.
The jetton-utils.fc file contains functions that help in creating and managing a Jetton wallet, making sure that all the necessary data is packed and that the correct address for the wallet is calculated.
The discovery-params.fc, op-code.fc files contain the standard operational codes for the minter and wallet contracts. Additionally, the function is_resolvable checks if a given address is within the same workchain as the contract. It extracts the workchain ID from the address and compares it with the current contract’s workchain ID. The params.fc also contains the same check that is used by the wallet contract.
Before proceeding, please make sure your contracts include required imports.
jetton-minter-discoverable.fc
jetton-wallet.fc
jetton-utils.fc
params.fc
-
In the folder
wrapperscreate or update the compile files:JettonMinter.compile.tsJettonWallet.compile.ts -
Run the command
build:
Wrappers
To test and run scripts for our smart contracts, we need to have TypeScript interfaces for them. Thewrappers folder contains such interface classes for all contracts (implementing Contract from @ton/core), including serialization primitives, getter wrappers and compilation functions.
Let’s copy the wrappers, JettonMinter.ts, JettonWallet.ts, JettonConstants.ts and ui-utils.ts, from the existing implementation to our project’s folder wrappers. You can also copy the shortened versions of the same files from our repository. Additionally, ui-utils.ts has a few adjustments there.
Tests and deployment
The Blueprint framework incorporates Sandbox. The package allows developers to emulate TON smart contracts behaviour as if they were deployed on a real network. Please copy the tests from our repository. As in the case with the wrappers, it’s a shortened version with a few adjustments based on examples prepared by the TON core team (here and here). To test the contracts using Sandbox, run the command:scripts folder, create deployJettonMinter.ts with the following code: